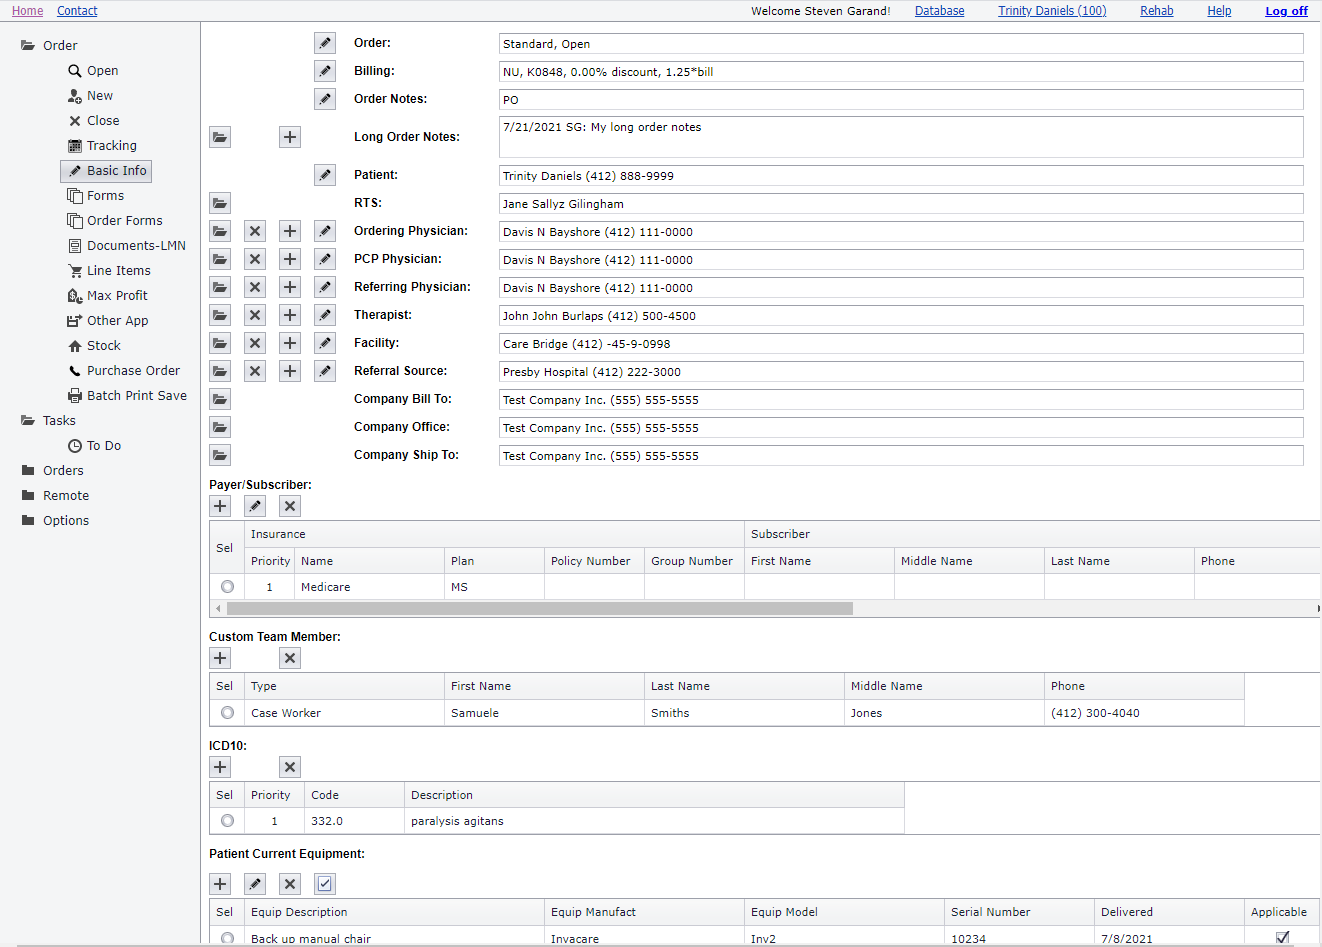
Edit Basic Info
 Updated
by
Steven Garand
Updated
by
Steven Garand
Single Item Buttons:

Grid Item Buttons:

Additional Grid Item Buttons For Moving Selected Payer Row Up Or Down In The Grid:

Patient Current Equipment Grid Buttons:

Editing a team member (pencil icon button) affects the team member on all orders not just the open order. To avoid confusion, editing team members in RxAdmin is recommended instead.
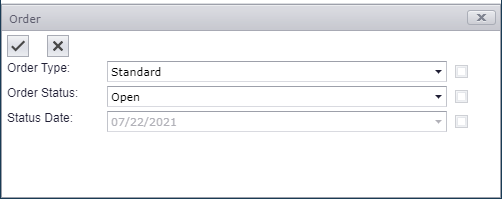
Order
Options
- Order Type: Select order work flow type
- Order Status: Select order status - Open, On Hold, Canceled, Completed
- Status Date: Read only date of when last order status was changed
Actions
- Edit Order Type or Order Status (pencil)
Set Order Completed: To set the order completed, click the Edit (pencil icon) next to the Order label, then set the Order Status to Completed in the dropdown. The order can be set to On Hold or Canceled as well. Order Status can be set at any time in the workflow and does not require all tasks completed. The system should be set up in RxAdmin however to automatically close the order after the last task is completed in the workflow.
Billing
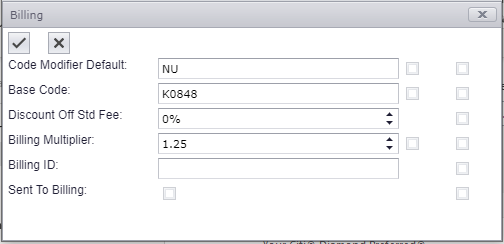
Options
- Code Modifier Default: Default modifier for line items generated in the current order - Will not affect existing line items, only new line items
- Base Code: The single base code to use for all line items for the current order
- Discount Off Std Fee: Percent discount off the standard fee charged for line items on this order
- Billing Multiplier: Value multiplied by Retail (MSRP) to calculate Retail for line items on this order
- Billing ID: Read only - Generated by sending order data to a separate 3rd party billing software and getting a return ID
- Sent To Billing: Read only - Indicate an order was previously sent to a separate 3rd party billing software
Actions
- Edit (pencil)
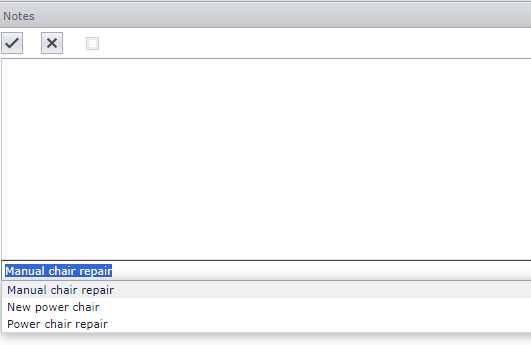
Order Notes
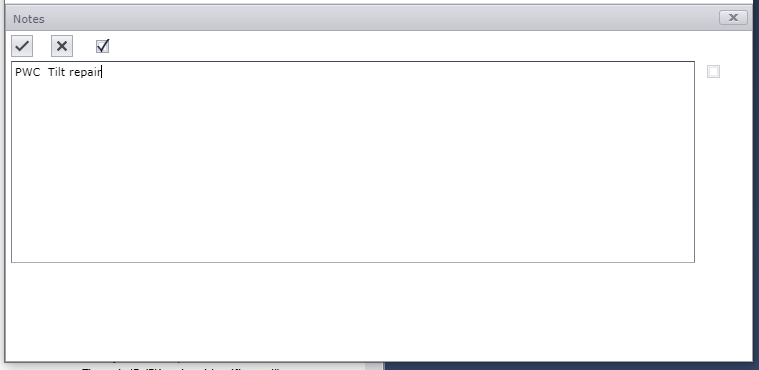
The notes can be appended from a drop down list of options just below the notes field.
Order notes are limited to 200 characters.
Order notes show in the grid when selecting an order.
Options
- Order note text - up to 200 characters.
Actions
- Edit (pencil)
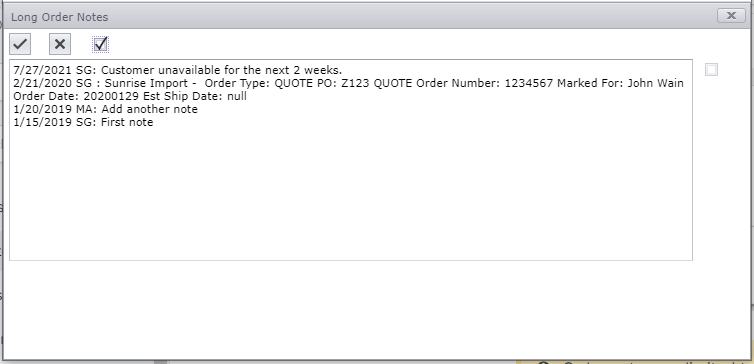
Long Order Notes
Show/Edit (folder):
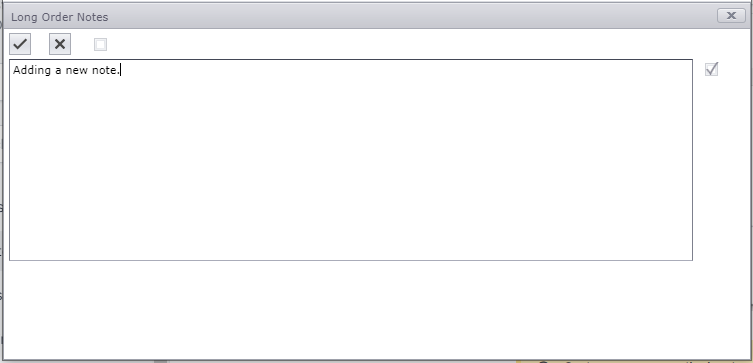
Add New (plus):
Order notes are limited to 8000 characters.
Only users with full permission can directly edit all long order notes, all other users are restricted to only adding new notes which are automatically date stamped and initialed.
Sunrise quote file imports automatically add long order note entries.
Options
- 'Allow Edit' checkbox (top of window): When checked allows users with full permission to directly edit all long order notes.
- Long order note text: Can be up to 8000 characters - If viewing (folder) all long order notes are shown with time stamps and initials - If adding (plus) the text entry is added to the existing long order notes along with an automatic date and initial information.
Actions
- View (folder): View or edit (if user has full permission) all long order notes.
- Add (plus): Add a new date and initial stamped note to existing notes.
Patient
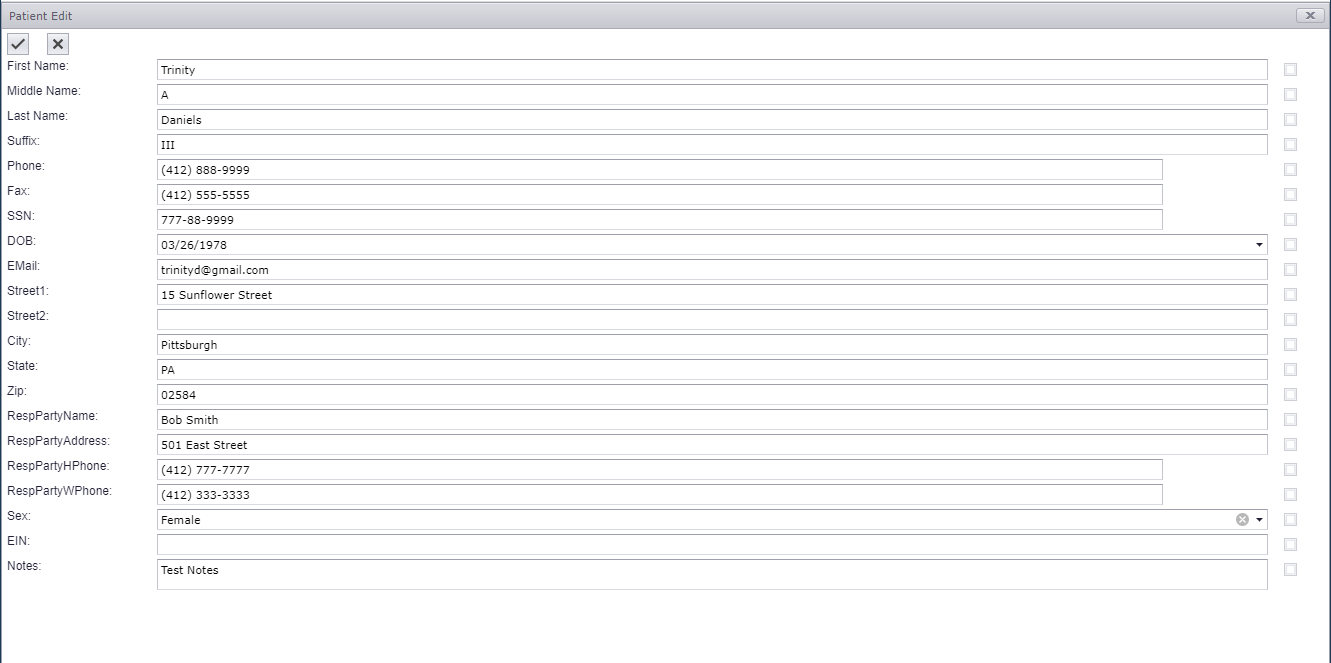
Editing patient information modifies the patient for all associated orders not just the open order.
Consider using RxAdmin to make team member edits to reduce the chance of unexpected changes for all orders.
Actions
- Edit (pencil): Edit patient information for all orders associated with the patient.
RTS (ATP)
Actions
- Select (folder): Select a different RTS (ATP) for the order.
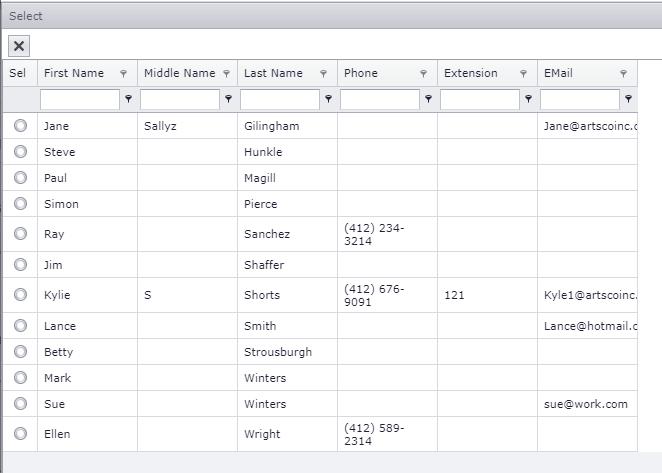
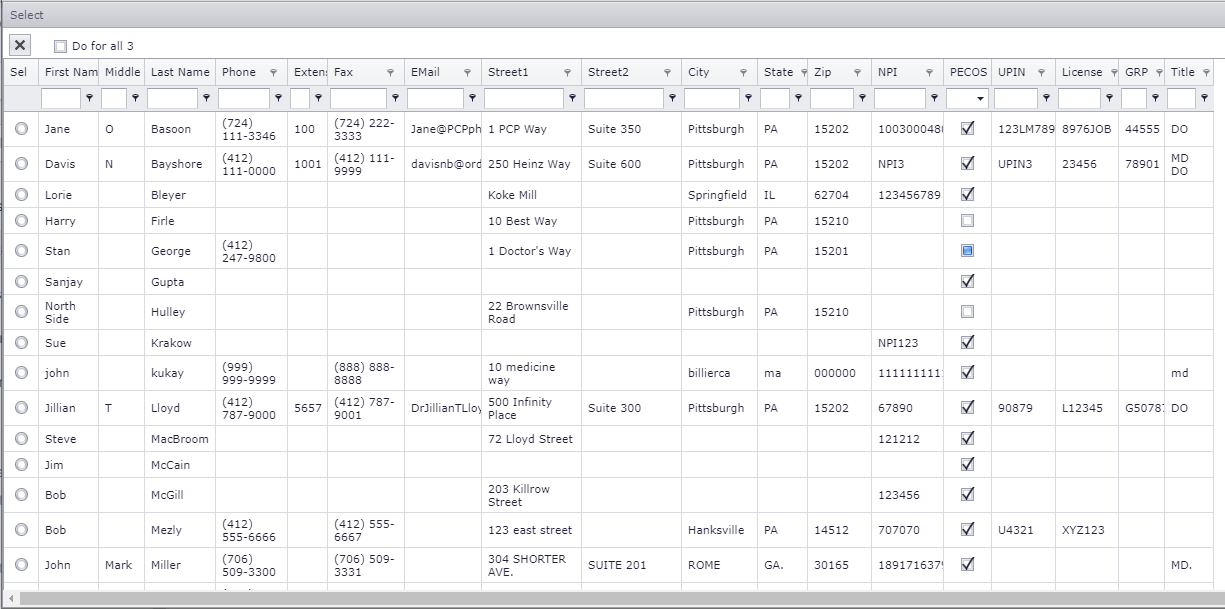
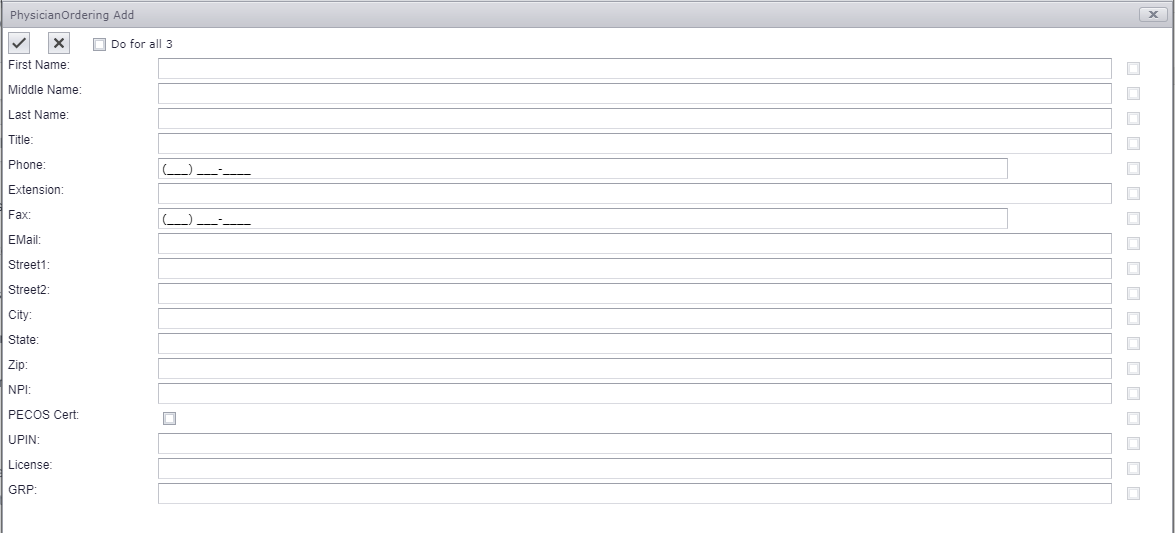
Ordering Physician, PCP Physician, Referring Physician
Select (folder):
Add New (plus):
There is only one list of physicians but a physician can be assigned to any of three types in an order, an ordering, PCP, or referring physician.
When a new physician is added to a particular physician type, the new physician is automatically selected for that type.
Check the 'Do for all 3' checkbox to automatically assign the selected or new physician to all three physician types.
Editing physician information modifies the physician for all associated orders not just the open order.
Consider using RxAdmin to make team member edits to reduce the chance of unexpected changes for all orders.
Options
- Do for all 3 checkbox (top of window): Checking the 'Do for all 3' checkbox automatically assigns the selected or new physician to all three physician types.
Actions
- Select (folder): Select a physician type for the order.
- Clear (x): Remove the selected physician type from the order - Note: Does not remove the physician from the system
- Add (plus): Add a new physician and automatically select the new physician as the physician type on the order - Check the 'Do for all 3' checkbox to automatically assign the selected or new physician to all three physician types
- Edit (pencil): Edit physician information for all orders associated with the physician.
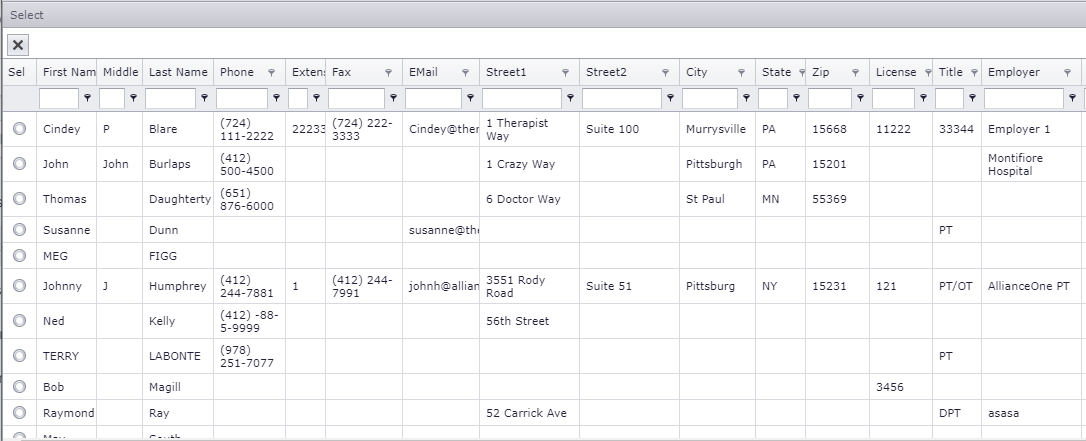
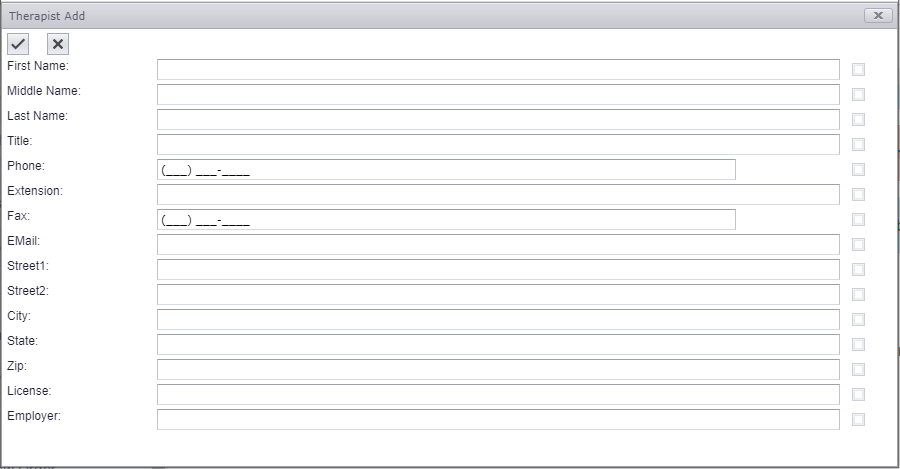
Therapist
Select (folder):
Add New (plus):
Editing therapist information modifies the therapist for all associated orders not just the open order.
Consider using RxAdmin to make team member edits to reduce the chance of unexpected changes for all orders.
Actions
- Select (folder): Select a therapist for the order.
- Clear (x): Remove the selected therapist from the order - Note: Does not remove the therapist from the system
- Add (plus): Add a new therapist and automatically select the new therapist for the order
- Edit (pencil): Edit therapist information for all orders associated with the therapist.
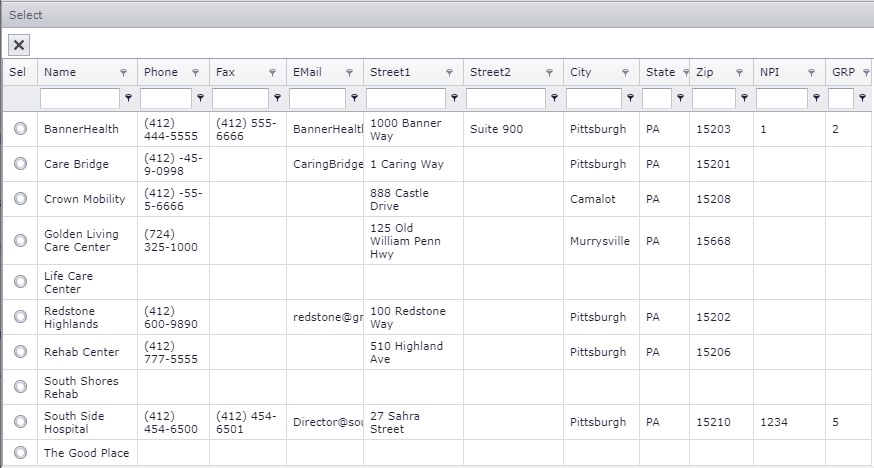
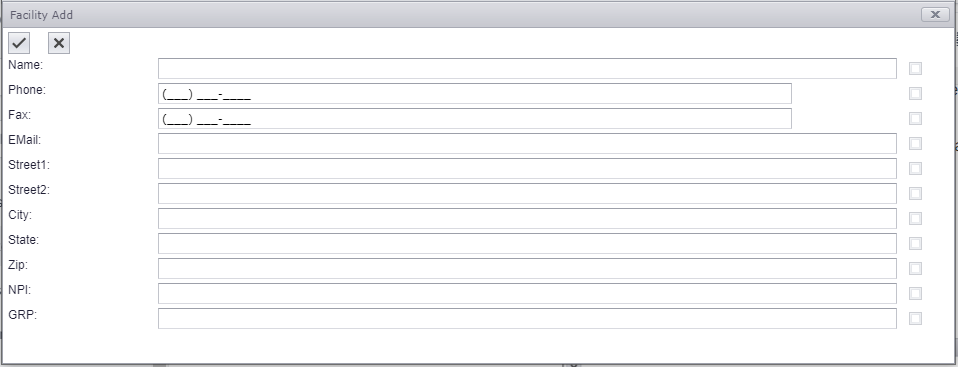
Facility
Select (folder):
Add New (plus):
Editing facility information modifies the facility for all associated orders not just the open order.
Consider using RxAdmin to make team member edits to reduce the chance of unexpected changes for all orders.
Actions
- Select (folder): Select a facility for the order.
- Clear (x): Remove the selected facility from the order - Note: Does not remove the facility from the system
- Add (plus): Add a new facility and automatically select the new facility for the order
- Edit (pencil): Edit facility information for all orders associated with the facility.
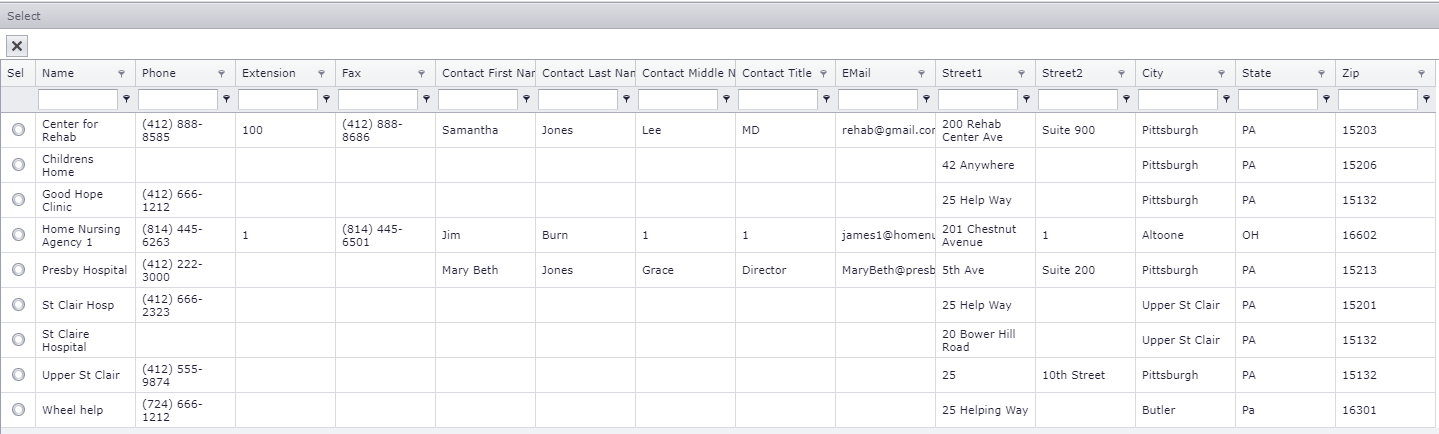
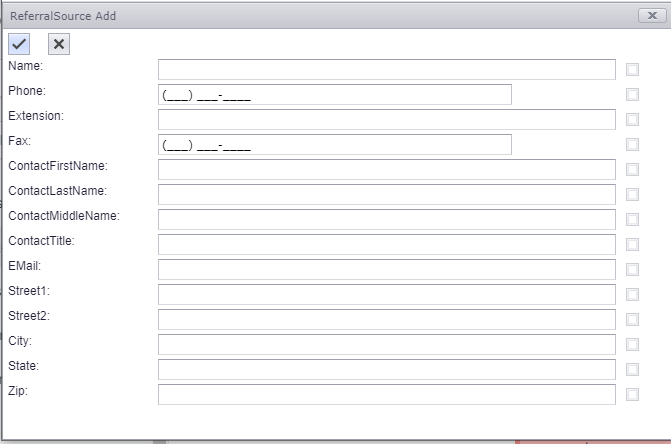
Referral Source
Select (folder):
Add New (plus):
Editing referral source information modifies the referral source for all associated orders not just the open order.
Consider using RxAdmin to make team member edits to reduce the chance of unexpected changes for all orders.
Actions
- Select (folder): Select a referral source for the order.
- Clear (x): Remove the selected referral source from the order - Note: Does not remove the referral source from the system
- Add (plus): Add a new referral source and automatically select the new referral source for the order
- Edit (pencil): Edit referral source information for all orders associated with the referral source.
Company Bill To, Company Office, Company Ship To
Select (folder):
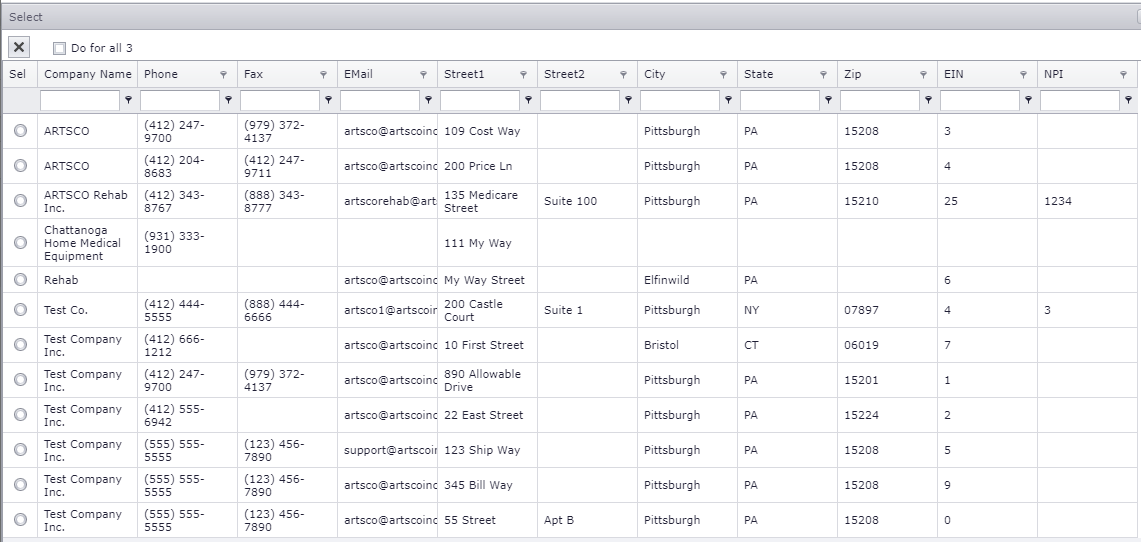
There is only one list of company addresses but a company address can be assigned to any of three types in an order, a bill to, office, or ship to company address.
When a new company address is added to a particular company address type, the new company address is automatically selected for that type.
Check the 'Do for all 3' checkbox to automatically assign the selected or new company address to all three company address types.
Options
- Do for all 3 checkbox (top of window): Checking the 'Do for all 3' checkbox automatically assigns the selected or new company address to all three physician types.
Actions
- Select (folder): Select a company address type for the order.
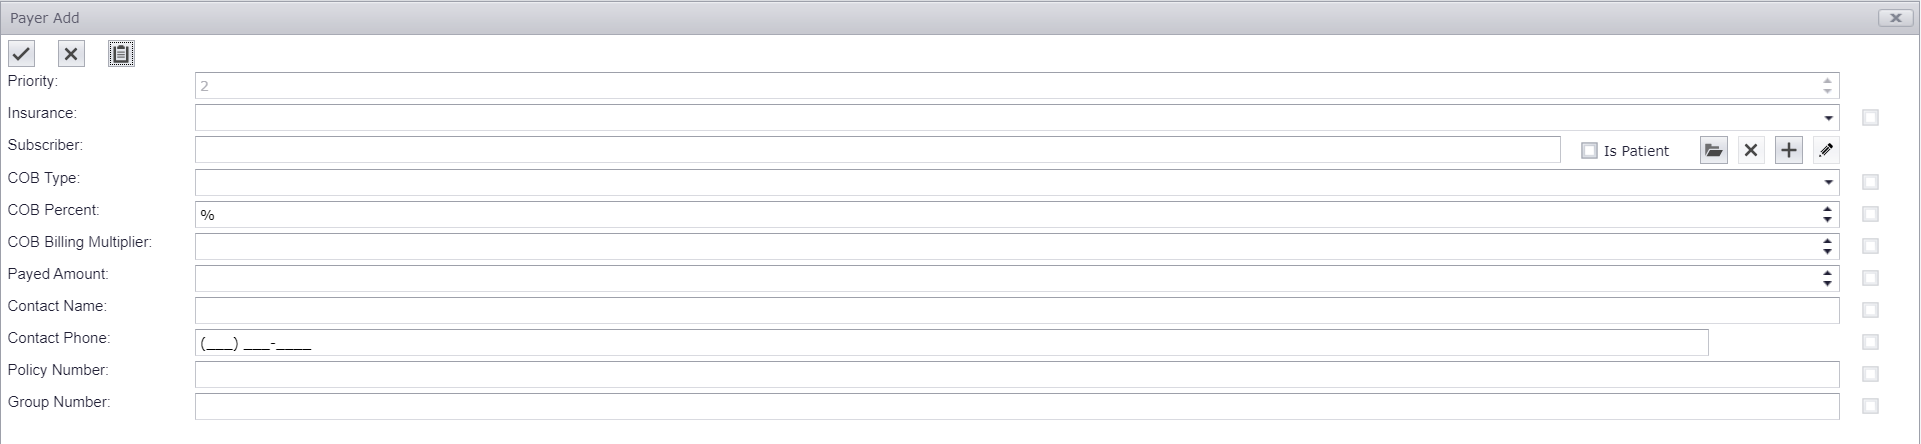
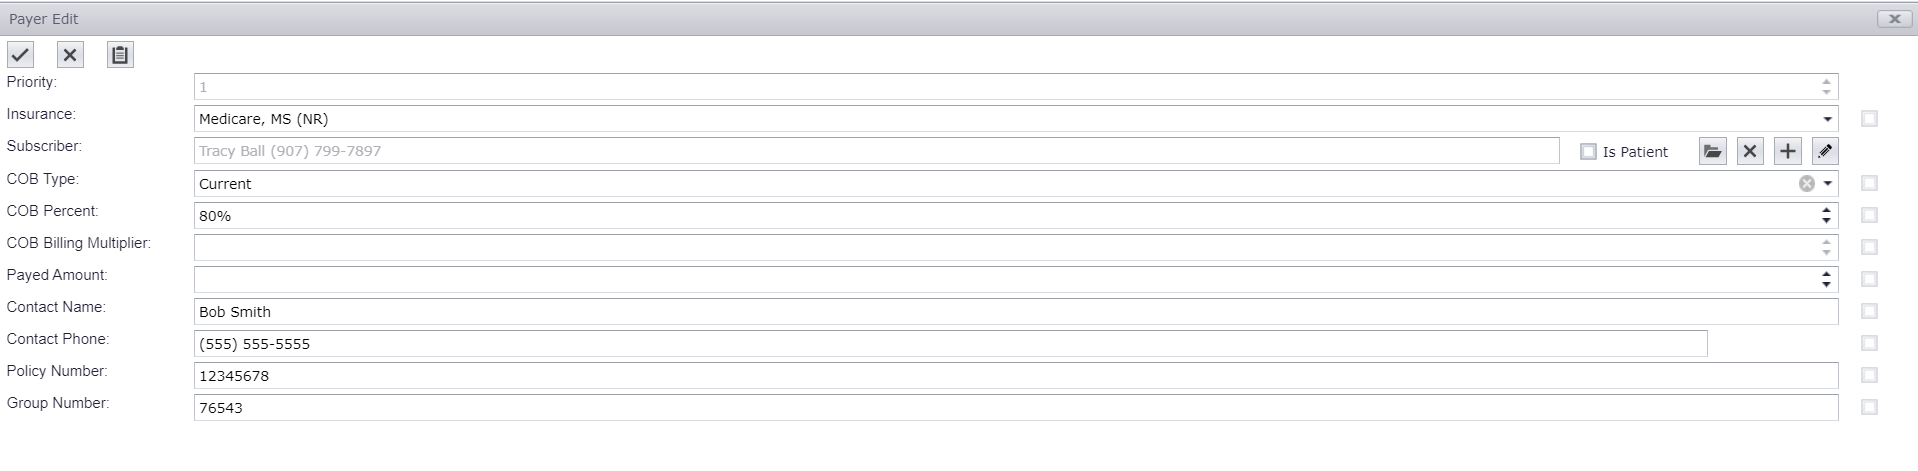
Payer/Subscriber
Add Payer (Click plus icon):
Edit Payer (Click Sel column then Pencil icon):
Select Subscriber (On Payer Edit or Payer Add page, click Subscriber Folder icon):
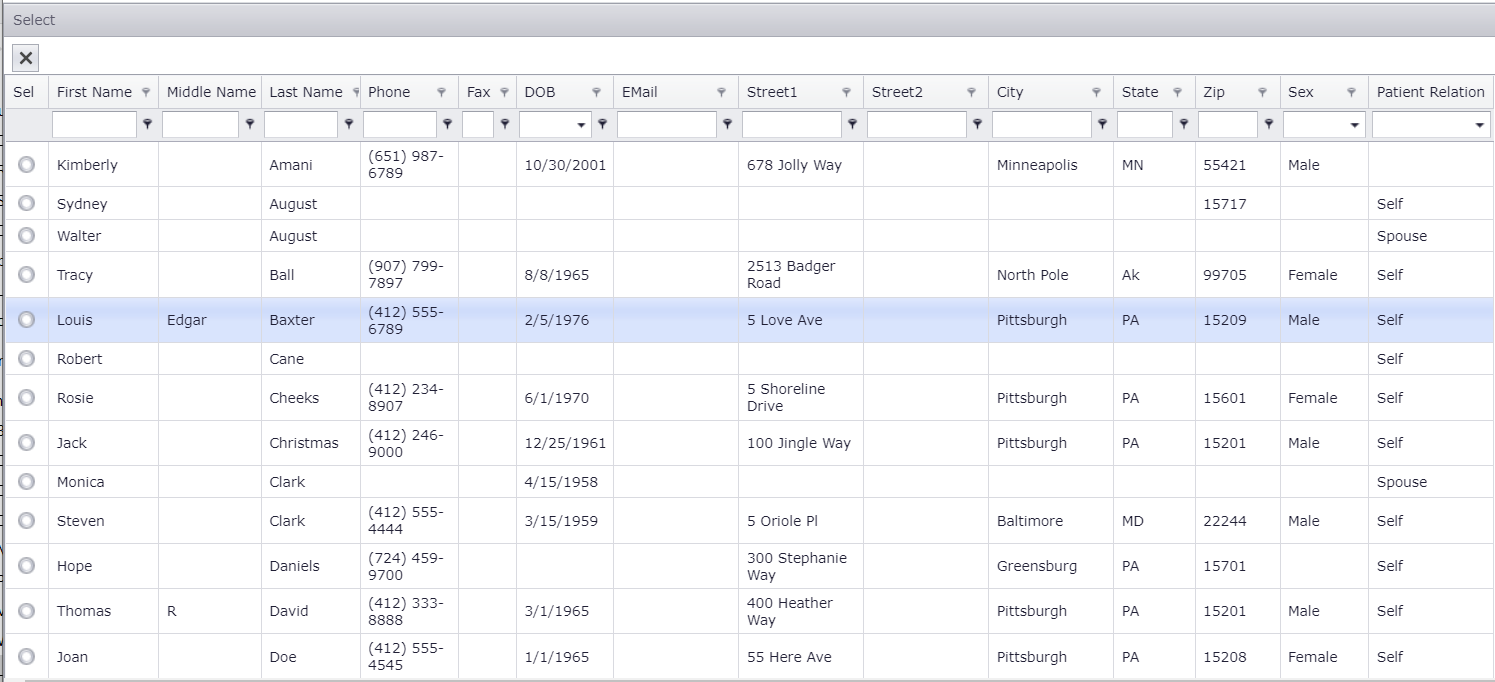
Add New Subscriber (On Payer Edit or Payer Add page, click Subscriber Plus icon):

Set Coordination Of Benefits (COB):
Up to 4 payers are allowed on the order.
If selecting Medicare as the insurance, use the 'Medicare Zip Code Lookup' (clip board icon) button to determine the Medicare rural or non rural status based on the patients zip code.
New Payers can only be added in RxAdmin.
If the COB Type is set to a value other than blank, the coordination of benefits (COB) feature is used which determines allow values between insurances on the order.
If the subscriber is the patient simply click the Is Patient check box.
Editing subscriber information modifies the subscriber for all associated payers on all orders not just the selected payer.
Consider using RxAdmin to make team member edits to reduce the chance of unexpected changes for all orders.
Options
- Priority: Payer priority - Determined by the sequence the payer is add - Read only, must remove and add payers in a new sequence to change the payer priority.
- Insurance: Payer - must select an existing payer - Can click the 'Medicare Zip Code Lookup' (clip board icon) button to display the Medicare rural or non rural status based on the patients zip code - New Payers can only be added in RxAdmin
- Subscriber: Owner of the insurance policy - Can be the patient in which case simply click the Is Patient check box
- Is Patient: When checked on, sets the subscriber as the patient
- Select (folder): Select existing subscriber for the payer
- Remove (x): Remove the selected subscriber from this payer - Does not remove subscriber from the system only from the payer on the order
- Add (plus): Add a new subscriber to the system and select the new subscriber to the payer on the order
- Edit (pencil): Edit subscriber information for all payers associated with the subscriber on all orders
- COB Type: Go to Coordination of Benefits for details
- Current
- RemainderFromCurrent
- RemainderFromPrimary
- RemainderFromRetail
- RemainderFromBill
- COB Percent: Percent applied to COB Type
- COB Billing Multiplier: Non primary insurances only - specify a billing multiplier to use if the allowable is MSRP times billing multiplier - The default billing multiplier is set from the billing multiplier set for the insurance in Rx Admin
- Payed Amount: Payment received for the order
- Contact Name: Payer contact name
- Contact Phone: Payer contact phone number
- Policy Number: Subscriber policy number
- Group Number: Subscriber group number
Actions
- Add (plus): Add an existing payer to the order - payer priority is determined by the sequence the payer is add
- Subscriber: Owner of the insurance policy
- Set Subscriber As Patient (check box): Check on Is Patient
- Select (folder): Select existing subscriber for the payer
- Remove (x): Remove the selected subscriber from this payer - Does not remove subscriber from the system only from the payer on the order
- Add New (plus): Add a new subscriber to the system and select the new subscriber to the payer on the order
- Edit Existing (pencil): Edit subscriber information for all payers associated with the subscriber on all orders
- Subscriber: Owner of the insurance policy
- Edit (pencil): Edit the selected payer - First click on Sel column in payer row
- Subscriber: Owner of the insurance policy
- Set Subscriber As Patient (check box): Check on Is Patient
- Select (folder): Select existing subscriber for the payer
- Remove (x): Remove the selected subscriber from this payer - Does not remove subscriber from the system only from the payer on the order
- Add New (plus): Add a new subscriber to the system and select the new subscriber to the payer on the order
- Edit Existing (pencil): Edit subscriber information for all payers associated with the subscriber on all orders
- Subscriber: Owner of the insurance policy
- Remove (x): Remove the selected payer from the order - First click on Sel column in payer row
- Move Select Row Up In The Grid (Up Arrow): Move the selected payer up in the grid order.
- Move Select Row Down In The Grid (Down Arrow): Move the selected payer down in the grid order.
Custom Team Member
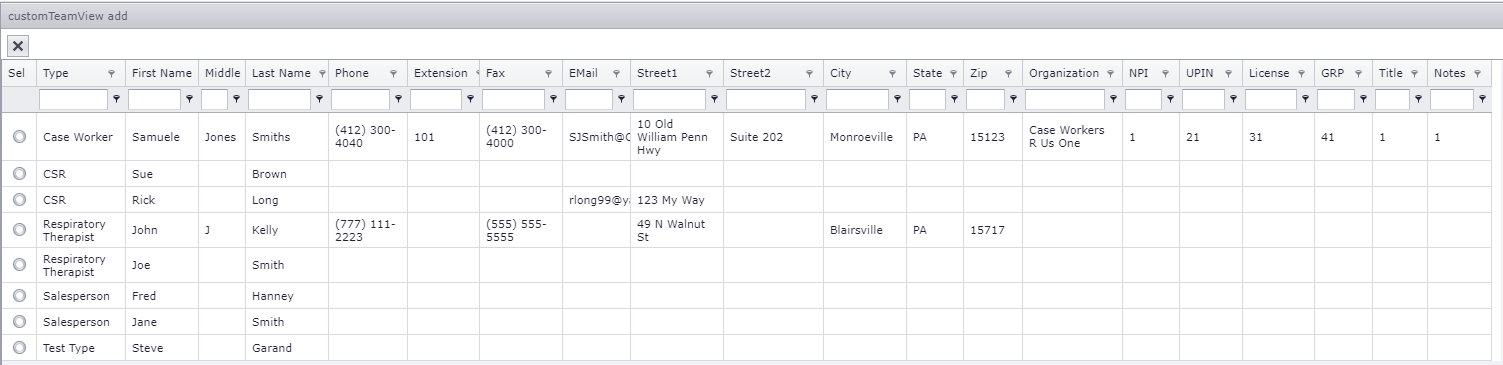
Actions
- Add (plus): Add an existing custom team member to the order -click on the Sel column in custom team member - New custom team members can only be added in RxAdmin
- Remove (x): Remove the custom team member from the order - First click on the Sel column in custom team member row
ICD10
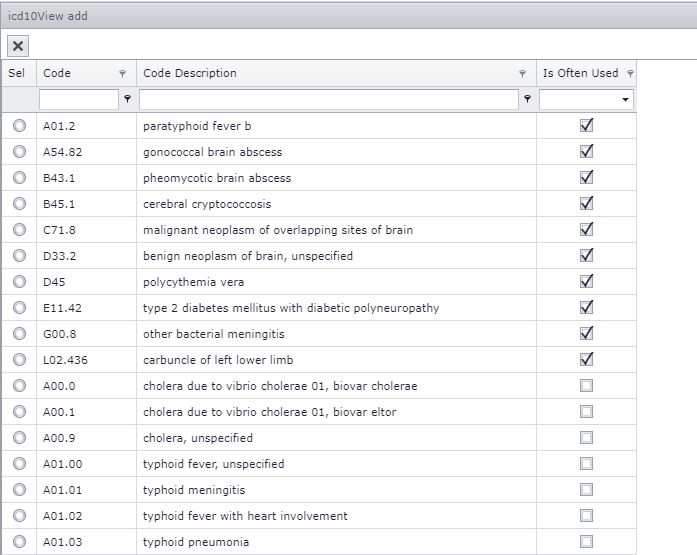
Actions
- Add (plus): Add an ICD10 to the order - Click on Sel column in ICD10 row
- Remove (x): Remove the custom team member from the order - First click on Sel column in ICD10 row
- Move Select Row Up In The Grid (Up Arrow): Move the selected payer up in the grid order.
- Move Select Row Down In The Grid (Down Arrow): Move the selected payer down in the grid order.
Patient Current Equipment

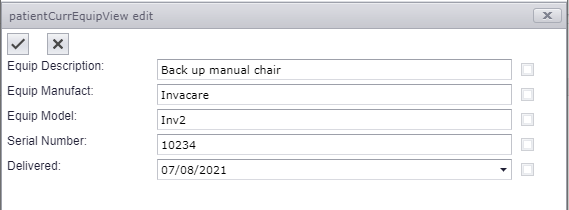
Options
- Equip Description: Description
- Equip Manufact: Manufacturer
- Equip Model: Model
- Serial Number
- Delivered: Date delivered
- Applicable: Patent current equipment associated with the order, for instance if this order was for the repair of the 'Back up manual chair', Applicable would be checked for this equipment item
Actions
- Add (plus): Add new current equipment to the patient associated with the order
- Edit (pencil): Edit current equipment for the patient associated with the order - First click on Sel column in patient current equipment row
- Remove (x): Remove the current equipment from the patient associated with the order - First click on Sel column in patient current equipment row
- Mark As Applicable (checkbox): Mark the item applicable to the current order, for instance if this order was for the repair of the 'Back up manual chair', Applicable would be checked for this equipment item