Set Up Before Using
 Updated
by
Steven Garand
Updated
by
Steven Garand
Setting up the system properly and completely before allowing user access is very important. ARTSCO will provide setup training to guide you through this process.
Useful items to have during the setup training include 1.) a spread sheet containing the fee schedule for an insurance fee schedule other than Medicare, 2.) discount structure for a manufacturer including your account number for this manufacturer, and 3.) justifications associated with a code used for generating the LMN.
Useful people to have during the setup meeting include individuals responsible for 1.) Billing, 2.) Manufacturer discounts, 3.) Code justifications for LMN generation, 4.) Security restrictions, and 5.) Work flow.
RxWeb is the preferred method to add the following team members (not RxAdmin): Physician, Facility, Referral Source, Therapist, Patient, Subscriber. Do use RxAdmin to modify these team members for all orders.
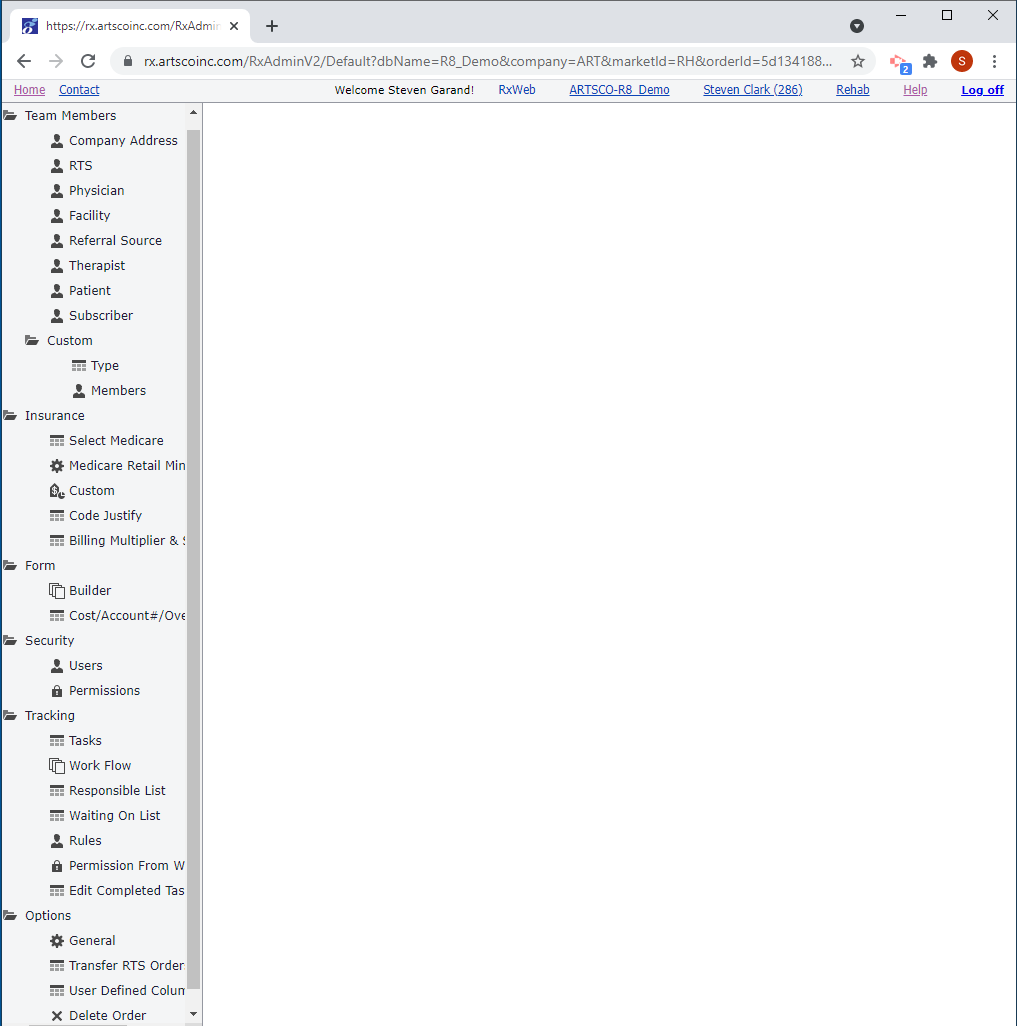
Complete the appropriate features shown in menu the above image and explained below.
Log In to RxAdmin and click on the following menu items (left side of the screen) and follow the instructions below.
Team Members
- Company Address - Add Company Address for all locations and any separate address for billing or shipping.
- RTS - Add information for each RTS or people responsible for the completion of an order from start to finish (typically an ATP).
- Custom - Add any custom group of people associated with an order such as a customer service rep (CSR).
- Type - Add the Custom Team Member Type name such as CSR.
- Members - Add the information for each Custom Team Member in the custom group.
Insurance
- Select Medicare - Select which States you will accept Medicare from.
- Medicare Retail Minus Codes - Set the Medicare retail minus percent for miscellaneous HCPCS codes such as K0108.
- Custom - Add any other insurance in addition to the ARTSCO maintained Medicare states.
- Code Justify - Modify default justifications and add new justifications for HCPCS codes.
- Billing Multiplier & Show Order - Set the value to be multiplied by MSRP to bill the customer for any insurances you have to charge the customer above MSRP - Priorities the insurances to show the most often used insurances at the top of the list presented to the user.
Form
- Builder - Add a grid form for your labor charges as follows - Add Vendor For Grid Form using your company name as the vendor. Add a new form and set the name of the form to Labor - Add a new item to the form with a description of Labor (15 min), a HCPCS code K0739, and your 15 minute charge as Retail - Repeat this process for any custom items you make and sell.
- Cost/Account#/Over Rides - Set your manufacturer cost and account numbers.
Security
- Users - Add users that can log into the system.
- Permissions - Create groups of access levels required for the types of users - Assign each user to the appropriate access level.
Tracking
- Tasks - Add any new tasks that do not already exist - IMPORTANT: Do not rename tasks to be a different task and do not change the Report Order.
- Work Flow - Modify the Standard work flow as appropriate. Add any additional workflows, usually based on the way you get payed, for example a cash sale.
- Responsible List - Add the information for all people that would be responsible for any task.
- Waiting On List - Add any shortcut phrases in order to save time typing, for example waiting on phone call back.
- Rules - Add rules to automatically select the appropriate responsible person for a task - multiple rules can be created for the same task such as if the RTS is Bob Smith the responsible person for task xyz is Sue Page but if the RTS is Melissa Smith the responsible person for task xyz is Mark Barns.
- Permission From Workflow - Set any permissions that are only applied after a task is completed in the workflow for example only send to Brightree after task xyz is completed (particularly important if you use the Brightree interface, since the order can only be sent once to Brightree) - Preventing users from modifying line items or the entire order can also be set after a particular task.
Options
- General - Set the office, ship to, and bill to default values.
- User Defined Columns - Set the name for any custom data type for a team member - up to 4 custom data types are allowed for a team member.